Application Firewall Add On
The Library — Add-Ons
page is the location of all of your deployed Add-Ons. If this
page is blank it means that you have not deployed any Add-Ons yet. You can
view your available Apps in the Library — Apps page. Here you will need
to first Download the App and then the Deploy button will become
available. You may Deploy more than one type of Add-On. For example you
may want to deploy two instances of a Firewall Add-On for different
services.
-
Buying an Application Firewall Add-On
-
Running your Application Firewall
-
Example Architecture
-
Accessing your Firewall Add-On
Buying an Application Firewall Add-On
- You can access the App Store direct at https://appstore.edgenexus.io or open the Services — App Store page from within your ALB-X
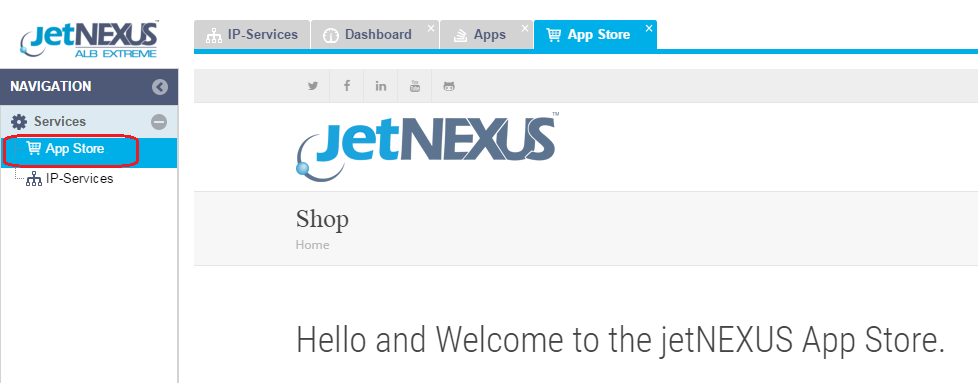
- Click on the Add-On icon

- Click on the edgeNEXUS Application Firewall icon
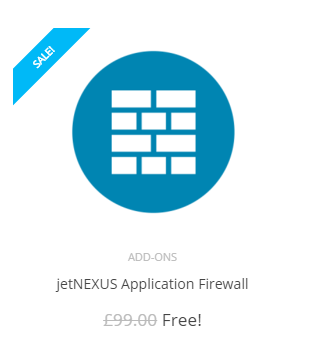
- You will see more information about the Application Firewall
- You can then choose how many you would like to download. If you are accessing the App Store from within your ALB-X please choose only 1
- If you are accessing direct from the website you may choose multiple and you can assign the correct MachineID to the App later in the process
- Click Add to Cart. (These are often free)
- Proceed to Checkout.
- Here you will be asked to login if you are a returning customer
- Alternatively you can fill out your billing details and tick the box to create an account. You will not be charged for products that are free
- Click Place Order
- You should now be presented with a screen that allows you download your product manually by entering the MachineID and clicking Download
- If the download is blanked out then you have already tied a purchase to another ALB-X
- If you have purchased from within an ALB-X via the Services — App Store page then you can now see your purchased Apps in the Library — Apps page
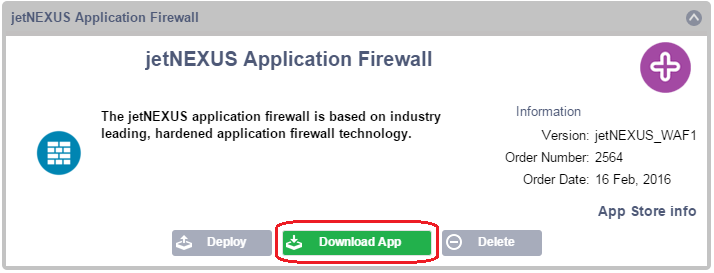
- Once you have purchased your Firewall App, the first step is to find it in the Library–Apps page and click the green Download button
- Once your Firewall has been downloaded you will be able to click the Deploy button (it will be greyed out if the Firewall has not been downloaded)
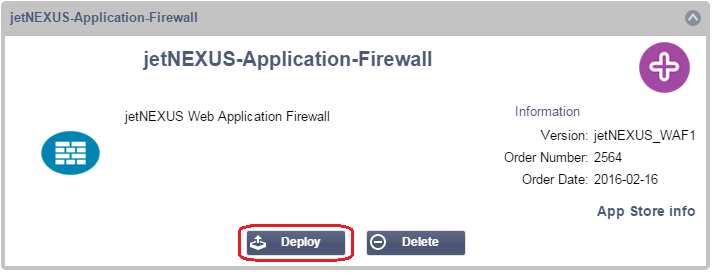
- Once you click Deploy your Firewall will be deployed in the Library — Add-Ons page
Running your Application Firewall
All Add-Ons run in a Docker Container and therefore have some networking constraints.
Once you have deployed your Add-On you will be able to set some parameters and start it

Stop:
Pause:
Play:
Container name:
You may use this as the name for a Real Server if you wish and it will resolve automatically to the Internal IP address of the instance
External IP:
you can set an External IP to access your Add-On. This may be to access the GUI of the Add-On as well as the service that runs via the Add-On.
External Port:
Example 80, 443, 88. Note the Firewall GUI address will be http://[External IP]:88/waf
So either leave the External Port setting blank or add in port 88.to access the GUI if you are restricting the port list.
Update:
can only update the settings of an Add-On once it has been stopped.
Once your instance has stopped you can change the Container name,
External IP and External Port settings.
Remove Add-On:
will completely remove the Add-On from the Add-On page. You will need
to go to the Library–Apps page to deploy the Add-On again.
Parent Image:
indicates the Docker image that the Add-On is built from. There might
be several versions of a Firewall or indeed another type of Add-On
completely so this will help to distinguish between them. This section
is for informational purposes only and therefore is greyed out.
Internal IP:
is automatically created by Docker and therefore cannot be edited. If
you stop the Docker instance and restart, a new internal IP address
will be issued. It is for this reason that you should either use an
External IP address for you service or you use the Container Name for
the Real Server Address of your service.
Started At:
Stopped At:
Example Architecture
Firewall Using External IP Address:
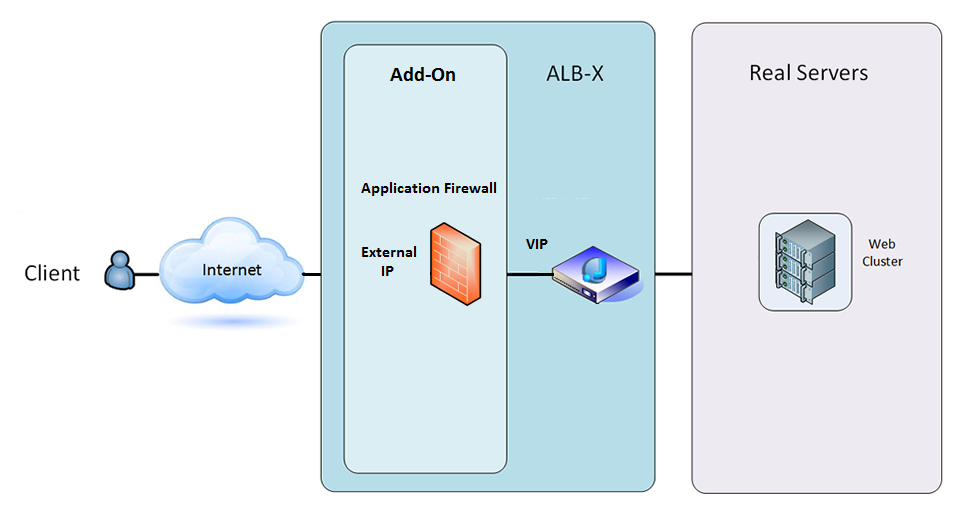
- In this architecture only HTTP can be used for your service as the Firewall cannot inspect HTTPS traffic.
- The Firewall will need to be configured to send traffic on to the ALB-X VIP.
- The ALB-X VIP in turn will be configured to load balance traffic to your web cluster.
Firewall Using Internal IP Address:
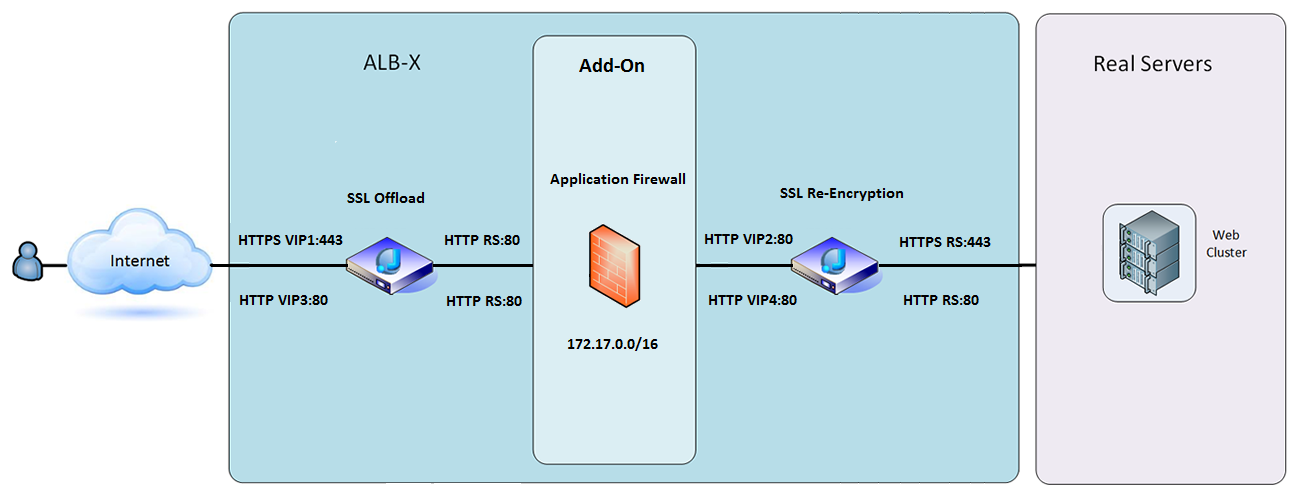
- In this architecture you can specify HTTP and HTTPS.
- HTTPS can be end to end where the connections from the Client to ALB-X are
encrypted and also from the ALB-X to the Real Servers. - The traffic from the ALB-X to the internal IP address of the firewall needs to be un-encrypted so that it can be inspected.
- Once the traffic has passed through the Firewall it is then forwarded on to
another VIP which can then either re-encrypt the traffic and load
balance to secure servers or simply load balance to insecure
servers over HTTP.
Accessing your Firewall Add-On
- Fill out the details for your Firewall
- You can either restrict your Ports to what you need or leave it blank to allow all ports
- Click the Play button
- An Add-On GUI button will appear

- Click on this button and it will open up a browser on http://[External IP]:88/waf in this example it will be http://10.4.8.15:88/waf
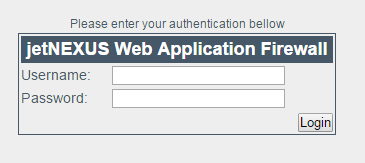
- Username: admin
- Password: jetnexus
- It is recommended to change the default password in the Management–Users section
- After logging in you will see the home page of the Application Firewall
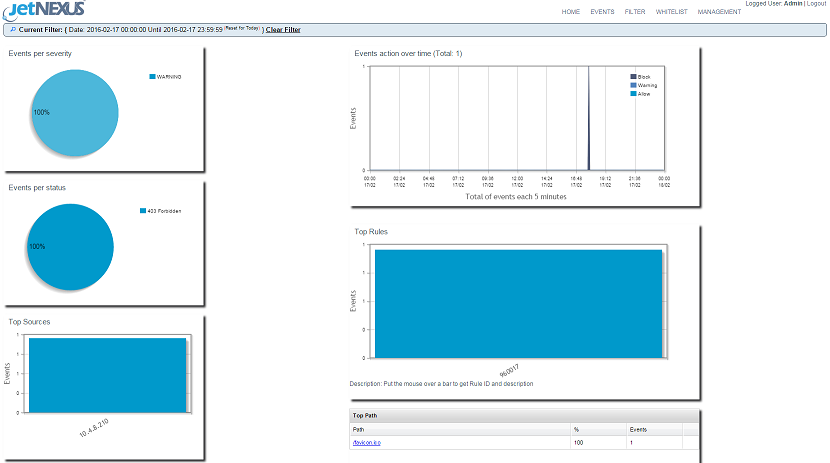
- The home page displays a graphical overview of the events, i.e. filtering actions performed by the Application Firewall.
- The graphs will most likely be blank when you first open the page as there will be no access attempts through the firewall.
- You
can configure the IP address or the domain name of the web site you
will like to send the traffic to after it has been filtered by the
firewall. - This is changed in the Management—>Config section

- The Firewall will inspect the traffic and then send it on to the Real Sever IP or VIP address here. You may also enter a port along with your IP address. If you just enter an IP address on its own the port will be assumed to be port 80. Click the “Update Configuration” button so save this new setting.
- When the Firewall blocks an application resource, the rule that is blocking traffic will appear in the Blocking Rules list on the Whitelist page.
- In order to prevent the firewall from blocking the valid application resource, please move the blocking rule to the Whitelist Rules section.
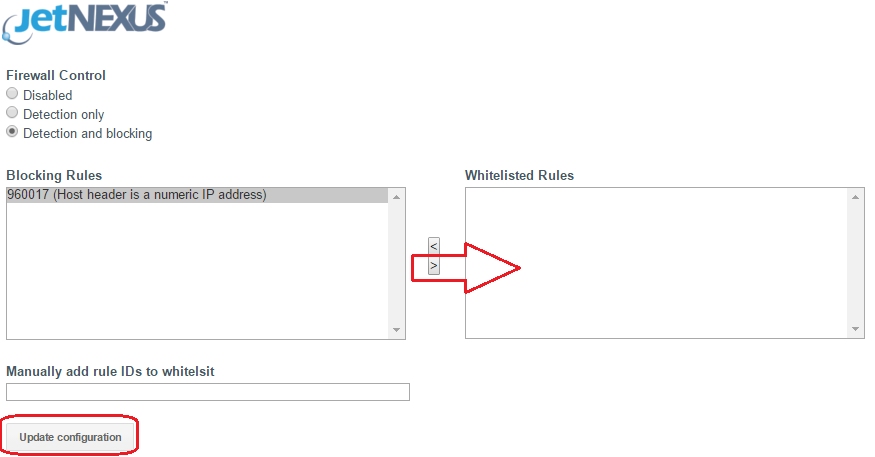
- Press Update Configuration when you have transferred all the rules from the Blocking section to the Whitelist section.
Updating Rules
- edgeNEXUS Application Firewall rules can be updated by accessing the Advanced — Software
- Click the Refresh to view available software button in the Software Upgrade Details section
- This will reveal an additional box called Download from Cloud
- Check to see if you there is an OWASP Core Rule set available

- If so you can highlight and click Download Selected Software to ALB-X
- This will then download the smart file to the Apply Software stored on ALB

- Highlight the jetNEXUS-WAF-OWASP-CRS and click Apply Selected Software Update and click Apply
- The Firewall will automatically detect updated rule set, load and apply it.
- The IDs
of Whitelisted rules will be kept, however new rules may start blocking valid
application resources. - Please check the Blocking Rules list on the Whitelist
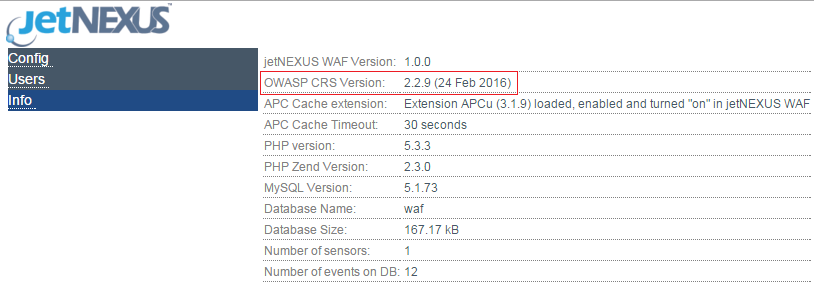
page in this case. - You can also check the Management Info section of the Firewall GUI for the OWASP CRS Version

 Back to Top