Virtual Appliance Installation Guide
Virtual Appliance Platforms
This is a guide of how to deploy Edgenexus ALB-X-VA. We support all the major hyper visors
Nutanix
KVM
Specification
Resource |
Minimum Spec |
Medium Spec |
High Spec |
| CPU | 2 | 4 | 8 |
| Memory | 2GB | 4GB | 8GB |
| Disk Space | 25GB | 25GB | 25GB |
| Network Adapters | 2 | 2-4 | 2-8 |
VMware ESXi
Supported Versions
Please download the latest installation package
Please download the latest installation package here
Once downloaded please unzip in a suitable directory on your ESXi host or SAN.
In your VSphere client select File: Deploy OVF Template.
-
- Browse and select the location where you have saved your files, Select the .OVF file and click NEXT
-
- You will be asked to name the appliance, Type and name and click NEXT
-
- You will be asked to select a data-store your Virtual Appliance will run from. Select a data-store with enough space and click NEXT
-
- You will be told information about the product, click NEXT
-
- Click NEXT your VA is then ready to be installed, once the files have been copied to the data-store
-
- Within your VSphere client, you will now be able to see the new virtual appliance
-
- Right click on the VA and go to Power then Power-On
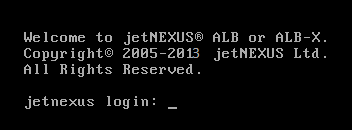
- Your VA will then boot, a Edgenexus boot screen will show on the console.
Please Refer to the Basic Configuration
Installing VMXNET3 Interface
The VMXnet3 driver is supported but you will need to make changes to the NIC settings first.
Note – Do NOT upgrade the VMware-tools
Enabling VMXNET3 interface on a freshly imported VA (never started)
1. Delete both NICs from the VM
2. Upgrade the VM hardware – -Right click on the VA in the list and select Upgrade Virtual Hardware (do not start a tools installation or update, just a HW upgrade)
3. Add two NICs and selected them to be VMXNET3 (after the HW upgrade it will show the option)
4. Start the VA as it would be started without 1-3. It will work with the VMXNET3
Enabling VMXNET3 interface on an already running VA
1. Stop the VM (CLI shutdown command or GUI power-off)
2. Get the MAC addresses of both NICs (remember the order of the NICs in the list!)
3. Delete both NICs from the VM
4. Upgrade the VM hardware (do not start a tools installation or update, just a HW upgrade)
5. Add two NICs and selected them to be VMXNET3 (after the HW upgrade it will show the option)
6. Set the MAC addresses for the new NICs accordingly to 2
7. Restart the VA
Hyper-V
The edgeNEXUS Virtual appliance can be easy installed onto a Microsoft Hyper-V Server. Extract the ALB-VA file to your local machine or server. Open Hyper-V Manager.
- In your Hyper-V Manager client right click on the server and select “Import Virtual Machine”
- Locate folder:
- Browse to the folder containing the virtual machine to import
- Select the Virtual Machine:
- Select the virtual machine to import from the right hand side. This name will be similar to “Edgenexus-ALB-X-6.8-64-HyperV2012.1100-1745”
- Choose Import Type:
- Click “Copy the virtual machine (create a new unique ID)”
- Choose Destination:
- Either tick “Store the virtual machines in a different location” or accept the default path for the HyperV configuration folder
- Locate Virtual Hard disks:
- Browse to the folder containing the virtual hard disks. This is the folder that you created and added the download files. We suggest a different folder for each ALB-X to be deployed
- Choose Storage Folder:
- This will default to C:\Users\Public\Documents\Hyper-V\Virtual Hard Disks\ which is fine or you can specify an alternative folder of your choice
- Summary:
- Check that you are happy with all of the details then click Finish to deploy
- Before Starting ALB-X:
- Your machine will be imported with a name similar to “Edgenexus ALB-X VA for Hyper-V”
- Ensure the correct network is selected on the NIC
- If you are installing more than one virtual appliance you will have to configure each appliance with a unique MAC address
- Starting your ALB-X:
- Right Click on this Virtual Machine and click “Connect”
- Click the green Start button or click “ActionStart”
- Your VA will then boot, a Edgenexus screen will
show on the console - You will then be presented with a logon to the VA
Refer to Basic Configuration
Basic Configuration
First Boot
On first boot the Edgenexus ALB-X will display on your console a menu to configure your network settings.
You now have two ways to setup your Edgenexus ALB-X.
Command Line
Graphical User Interface (GUI)
Command Line
Login Details
Default password = jetnexus
First Boot – Manual Network Details
- Upon first boot you will have two options to proceed futher
- Press 1 to enter networking details manually
- You can then enter the following details
- IP Address
- Subnet Mask
- Gateway
- DNS Server
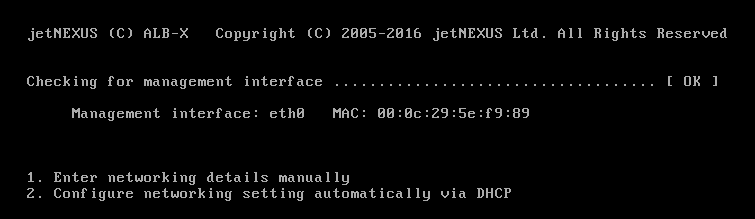
First Boot – DHCP successful
- Press 2 to configure the network settings automatically via DHCP
- If contact is successful then your machine will be assign the following details
- IP Address
- Subnet Mask
- Default Gateway
- DNS Server
- These changes will survive after reboot and don’t need to be configured again on the GUI
First Boot – DHCP Fails
- If you do not have a DHCP server or the connection fails then the IP Address 192.168.100.100 will be assigned
- The IP address will increase by 1 until a free address is found
- If 192.168.100.100 is already assigned to the network then it will assign 192.168.100.101 and so on
Change the Management IP Address

Change the Subnet Mask for eth0

Assign a Default Gateway

Check the Default Gateway has been added

You should now be able to access the Graphical User Interface (GUI)
Default Secure port = 443
Default Username = admin
Default Password = jetnexus
The User Guide is available here
Command Reference Table
Command |
Parameter1 |
Parameter2 |
Description |
Example |
| date | This will show the configured date and time that is currently configured | Tue Sept 3 13:00 UTC 2013 | ||
| defaults | Assign the factory default settings for your appliance | |||
| exit | Log out of the command line interface | |||
| help | Displays all valid commands | |||
| ifconfig | [blank] | View the interface configuration for all interfaces | ifconfig | |
| eth0 | View the interface configuration of eth0 only | ifconfig eth0 | ||
| machineid | This command will provide the machineid used to licence the Edgenexus ALB-X | EF4-3A35-F79 | ||
| quit | Log out of the command line interface | |||
| reboot | Terminate all connections and reboot the jetNEXUS ALB-X | reboot | ||
| restart | Restart the Edgenexus ALB-X virtual services | |||
| route | [blank] | View the routing table | route | |
| add | default gw | Add the default gateway IP address | route add default gw 192.168.100.254 | |
| set | greenside | Set the management IP address for ALB-X | set greenside=192.168.101.1 | |
| mask | <interface> | Set the subnet mask for an interface. Interface names are eth0, eth1…. | set mask eth0 255.255.255.0 | |
| show | Displays the global configuration settings | |||
| shutdown | Terminate all connections and power-off the Edgenexus ALB-X | |||
| status | Displays the current data statistics | |||
| top | View the process information such as CPU and Memory | |||
| viewlog | messages | Displays the raw syslog messages | viewlog messages |
Please note: Commands are not case sensitive. There is no command history.
Graphical User Interface
Please access your GUI interface at location
https://<management ip address>:27376 for all builds prior to
3.54.1 (Build 1540)
The
default port has now been changed to 443 for all builds deployed
after April 2014 and Software version 3.54.1 (Build 1540)
https://<management ip address>
View the User Guide here
 Back to Top