SSL
Certificates
The Configure-SSL
Certificates tab contains four sub-pages. They are
organised below.
What can edgeNEXUS do with SSL?
The jetNEXUS ALB-X has the ability to offload the SSL encryption and decryption work
load from your real servers and also becomes the termination point
for your SSL certificates. The jetNEXUS ALB-X also has the ability to
re-encrypt traffic to the real servers for more secure environments.
Create Certificate
To create a local
certificate:
- Fill in all the details like the example below
- Click on Create Local Certificate
- Once you have clicked this you can apply the certificate to a Virtual Service.
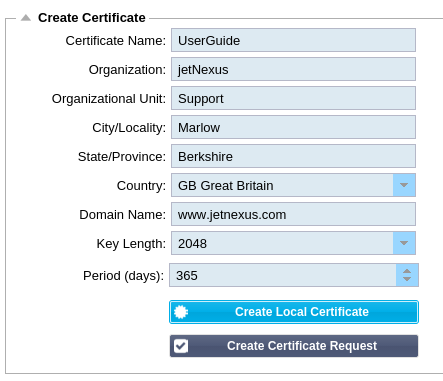
To create a Certificate Request:
- Fill in all the details like the example below except for the Period
- Click on the bottom button called “Create Certificate Request”

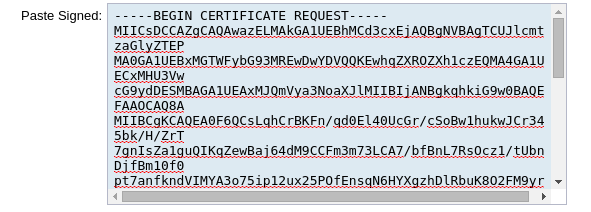
- Once you have clicked this, a certificate request will pop-up.
Please ensure your browser allows pop-ups - Copy this information from —-Begin Certificate Request—– to
—–End Certificate Request—– and paste into a text file - This information can now be pasted into the CSR required by your
Certificate Authority
Refer to Installing a certificate
to complete the process.
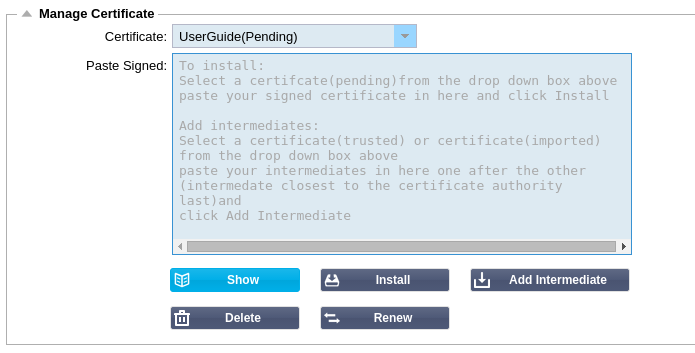
Manage Certificates
Install a
certificate:
This will allow you to install a certificate from a CSR:
- Select a certificate from the drop-down list that has
(pending) tagged on the end - Paste your signed certificate that you received back from
the Certificate Authority at the top
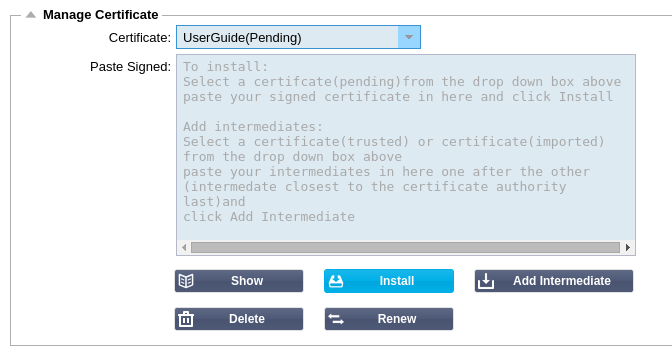
- You may also paste in the Intermediates below this taking
care to follow the correct order:
- (TOP)———————————-Your Signed
Certificate - (2nd From Top)———————Intermediate 1
- (3rd from Top)———————–Intermediate 2
- (Bottom)——————————-Intermediate 3
- Root Certificate Authority———No need to add this as they
exist on the client machines. (ALB-X also contains a root bundle for
re-encryption where it acts as a client to a real server)
- Click Install
- Once you have installed you should see (Trusted) next
to your certificate - If
you have made a mistake or entered the wrong intermediate order then
simply select the Certificate (Trusted) and add the certificates
(including the signed certificate) again in the correct order and
click Install
Add Intermediate:
It is useful on occasion to add in the intermediates separately. For
example if you have imported a certificate that does not have
intermediates.
- Highlight a Certificate (trusted) or certificate (imported)
- Paste the intermediates one below the other taking care that the intermediate closest to the Certificate authority is last
- Click Add Intermediate.
- If you make a mistake with the order you can repeat the process
and add the intermediates again. This will overwrite the previous intermediates only.
Renew a
certificate:
This will allow you to
obtain a new Certificate Signing Request.
- Select a certificate from the drop-down list, you may choose any certificate (Pending), (Trusted) or (Imported)
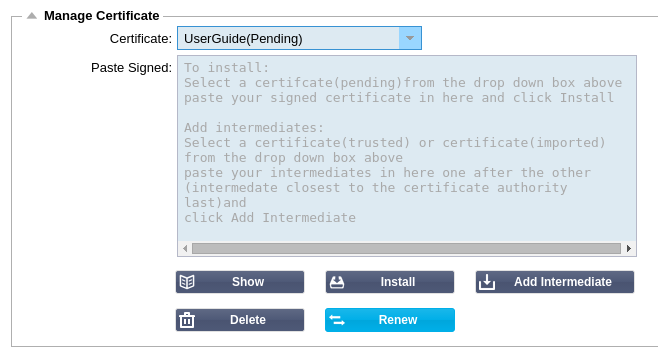
- Click Renew
- This will provide a new certificate request as above
Show the
details of a certificate:
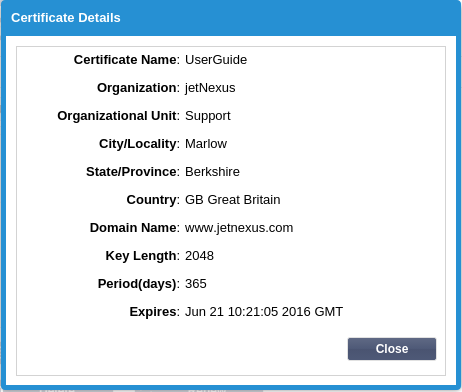
This will enable you to view the details of the certificate selected:
- Select a certificate from the drop-down list
- Click Show
- A pop-up will provide the details of the certificate like
the example below
Delete a
Certificate:
This will allow you to delete the selected certificate from the ALB-X
- Select a certificate from the drop-down list
- Click “Delete” at the bottom of the page

- The certificate is no longer installed on the jetNEXUS ALB-X
Import Certificate
Single Certificate:
This section allows you to import a signed certificate from a trusted
Certificate Authority (CA). The signed certificate must be in PKCS#12
format. This container format can contain multiple embedded objects,
such as multiple certificates and is usually protected with a password.

To import your certificate:
- Give your certificate a friendly name,
this is to identify it in the drop down list. It does not need to be
the same as the certificate domain name and must be alphanumeric only with
no spaces - Type the password you used to create the PKCS#12 container
- Browse for the certificate.pfx
- Click Import.
- Your certificate will now be in the SSL drop down
box for your channel
Multiple Certificates:
This section allows you to import a
JNBK file that contains multiple certificates. A JNBK is an encrypted
file produced by jetNEXUS ALB-X when exporting multiple certificates.
- Browse for your filename.jnbk file – you can create one of these by exporting multiple certificates
- Type the password you used to create the jnbk file
- Click Import.
- Your certificates will now be in the SSL drop down
box for your service

Export Certificate
This
section allows you to export any certificates that are installed on the
jetNEXUS ALB-X. The certificate will be exported in PKCS#12 container
format which will include the private key and intermediate certificates.

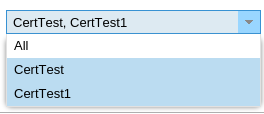
- Tick the certificate or certificates you wish to install. You may all tick All to automatically tick all certificates
- Type
a password to protect your certificates. This must be at least 6
characters in length. Letters, numbers and certain symbols can be used - The following characters cannot be accepted < > ” ‘ ( ) ; \ | \A3 % &
- Click Export
- Single Certificate: Your certificate will be saved as sslcert_<certificatename>.pfx – Example sslcert_Test1Cert.pfx
- Multiple Certificates: Your certificates will we saved as sslcert_pack.jnbk
Note: A jnbk file is an
encrypted container file produced by the jetNEXUS ALB-X. These types
of files can only be imported by the jetNEXUS ALB-X
 Back to
Top