ISO Installation Guide
Scope
The aim of this guide is to provide assistance with the installation of Edgenexus ALB-X appliance on your own hardware.
Download and create CD-ROM
Please download the latest ISO package from our FTP site here or our dropbox here
You can use your default CD burner application to burn the ISO image to a CD-ROM or USB.
Note the hard disk will be completely wiped and reformatted as part of the install process.
Specification
Resource |
Minimum Spec |
Medium Spec |
High Spec |
| CPU | 2 Core | 4 Core | 12 Core |
| Memory | 2GB | 4GB | 8GB |
| Disk Space | 80GB (SDA) | 120GB SSD (SDA) | 120GB SSD (SDA) |
| Network Ports | 2 Intel/Broadcom | 2-4 Intel/Broadcom | 2-8 Intel/Broadcom |
Installation
Boot your server hardware from the newly created CD-ROM
The server will boot to the edgeNEXUS install screen

Type “install” if you are using a CD-ROM/Virual CD-ROM and hit enter as per the on screen instructions.
Type “install-usb” if you are using a USB drive and hit enter as per the on screen instructions.
The install process will start, giving you time for a coffee break.
![]()
You should then see and status bar indicating progress
Once the CD-ROM is ejected, the server hardware will reboot.
Congratulations you now have a Edgenexus ALB-X load balancer.
Please refer Basic Configuration to assign an IP Address and log on to the GUI.
Basic Configuration
First Boot
Please ensure you have plugged in a live Ethernet cable into eth0. On
first boot the Edgenexus ALB-X will try and obtain an IP address using
DHCP. If there is no DHCP server present it will boot with it’s default
IP address of 192.168.100.100. On subsequent boots DHCP is disabled.
You now have two ways to setup your Edgenexus ALB-X.
Command LIne
Graphical User Interface (GUI)
Command Line
Login Details
Default password = jetnexus
First Boot – Manual Network Details
- Upon first boot you will have two options to proceed futher
- Press 1 to enter networking details manually
- You can then enter the following details
- IP Address
- Subnet Mask
- Gateway
- DNS Server
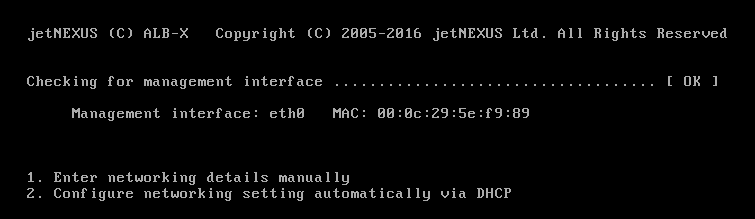
First Boot – DHCP successful
- Press 2 to configure the network settings automatically via DHCP
- If contact is successful then your machine will be assign the following details
- IP Address
- Subnet Mask
- Default Gateway
- DNS Sever
- These changes will survice after reboot and dont need to be configured again on the GUI
First Boot – DHCP Fails
- If you do not have a DHCP server or the connection fails then the IP Adress 192.168.100.100 will be assigned
- The IP address will increase by 1 untill a free address is found
- If 192.168.100.100 is already assigned to the network then it will assign 192.168.100.101 and so on
Change the Management IP Address

Change the Subnet Mask for eth0

Assign a Default Gateway

Check the Default Gateway has been added

You should now be able to access the Graphical User Interface (GUI)
Default Secure port = 443
Default Username = admin
Default Password = jetnexus
The User Guide is available here
Command Reference Table
Command |
Parameter 1 |
Parameter 2 |
Description |
Example |
| date | This will show the configured date and time that is currently configured | Tue Sept 3 13:00 UTC 2013 | ||
| defaults | Assign the factory default settings for your appliance | |||
| exit | Log out of the command line interface | |||
| help | Displays all valid commands | |||
| ifconfig | [blank] | View the interface configuration for all interfaces | ifconfig | |
| eth0 | View the interface configuration of eth0 only | ifconfig eth0 | ||
| machineid | This command will provide the machineid used to licence the Edgenexus ALB-X | EF4-3A35-F79 | ||
| quit | Log out of the command line interface | |||
| reboot | Terminate all connections and reboot the Edgenexus ALB-X | reboot | ||
| restart | Restart the Edgenexus ALB-X virtual services. | |||
| route | [blank] | View the routing table | route | |
| add | deafault gw | Add the default gateway IP address | route add default gw 192.168.100.254 | |
| set | greenside | Set the management IP address for ALB-X. | set greenside=192.168.101.1 | |
| mask | <interface> | Set the subnet mask for an interface. Interface names are eth0, eth1…. | set mask eth0 255.255.255.0 | |
| show | Displays the global configuration settings | |||
| shutdown | Terminate all connections and power-off the Edgenexus ALB-X | |||
| status | Displays the current data statistics | |||
| top | View the process information such as CPU and Memory | |||
| viewlog | messages | Displays the raw syslog messages | viewlog messages |
Please note: Commands are not case sensitive.There is no command history.
Graphical User Interface
Please access your GUI interface at location
https://<management ip address>:27376 for all builds prior to
3.54.1 (Build 1540)
The default
port has now been changed to 443 for all builds deployed after
April 2014 and Software version 3.54.1 (Build 1540)
https://<management ip address>
View the User Guide here
 Back to Top