ALB-X for Azure Marketplace Installation Guide
In this guide
Summary
Traffic Flow
Recommendations
Limitations
Deploying an ALB-X in Azure
Licencing
References
Summary
This guide is intended to provide an overview of Edgenexus ALB-X for Azure. It
will describe the process to find, build and setup our advanced Layer7
accelerating load balancer in the Microsoft Azure infrastructure
Traffic Flow
Azure Load Balancer
There are two levels for load balancing available for Azure infrastructure services:
-
- DNS Level:
Load balancing for traffic to different cloud services located in different data centers. - Network Level: Load
balancing of incoming traffic to different virtual machines of a
cloud service, or load balancing traffic between virtual machines in a
cloud service or virtual network. This is done with the Azure Load
Balancer
- DNS Level:
Virtual
machines in the same cloud service or virtual network can communicate
with each other directly using their private IP addresses. Computers
and services outside the cloud service or virtual network can only
communicate with virtual machines in a cloud service or virtual network
with a configured endpoint. An endpoint is a mapping of a public IP
address and port to that private IP address and port of a virtual
machine or web role within an Azure cloud service.
The
Azure Load Balancer randomly distributes a specific type of incoming
traffic across multiple virtual machines or services in a configuration
known as a load-balanced set. For example, you can spread the load of
web request traffic across multiple web servers or web roles.
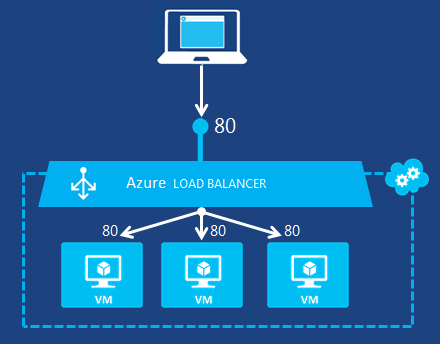
The
following figure shows a load-balanced endpoint for standard
(unencrypted) web traffic that is shared among three virtual machines
for the public and private TCP port of 80. These three virtual machines
are in a load-balanced set.
Edgenexus ALB-X for Azure
Whilst the Azure Load Balancer provides layer 4 load balancing for your
cloud service, the Edgenexus ALB-X offers application delivery and
optimisation features such as Layer 7 load balancing with session
persistence, traffic manipulation,
content caching, compression and SSL offload to name but a few. The
Edgenexus ALB-X also provides granular control of the real servers
allowing you to take real servers in and out of service on the fly
without losing connectivity. Please follow this link for the full list of features.
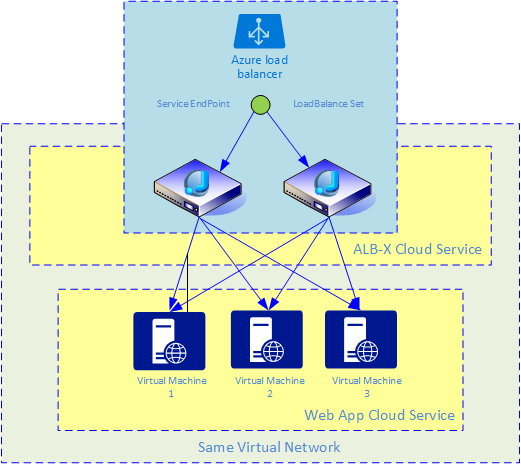
There are a few ways that you may want to deploy your Edgenexus ALB-X in
azure. edgeNEXUS recommends deploying in a highly available (HA) configuration.
The figure below shows how a typical HA deployment will look using two Edgenexus ALB-X to provide HA for three web servers.
Recommendations
-
- Edgenexus ALB-X virtual machines are created in the same cloud service.
- Both ALB-X VMs should be configured in the same availability set.
- Configure each service or endpoint in a load balance set for Active-Active configuration.
- The
default distribution method for Azure load balancer is 5 tuple. This
can be changed to provide IP based affinity, please see this link for more information. - Licence both ALB-X.
- Application Virtual Machines may be created in a separate cloud service.
- Both the Edgenexus ALB-X virtual machines and the application virtual machines should be in the same virtual network.
Limitations in Azure
-
- Edgenexus ALB-X in Azure is limited to one network interface
and as such the connectivity modes of Transparency and Gateway will not
work.
- Edgenexus ALB-X in Azure is limited to one network interface
-
- All ALB-X virtual services in Azure share the same IP address so Clustering between ALB-X is not possible at this stage. You must
configure each ALB-X individually. We are working on a method to
synchronize configurations in Azure.
- All ALB-X virtual services in Azure share the same IP address so Clustering between ALB-X is not possible at this stage. You must
Deploying your Edgenexus ALB-X in Azure
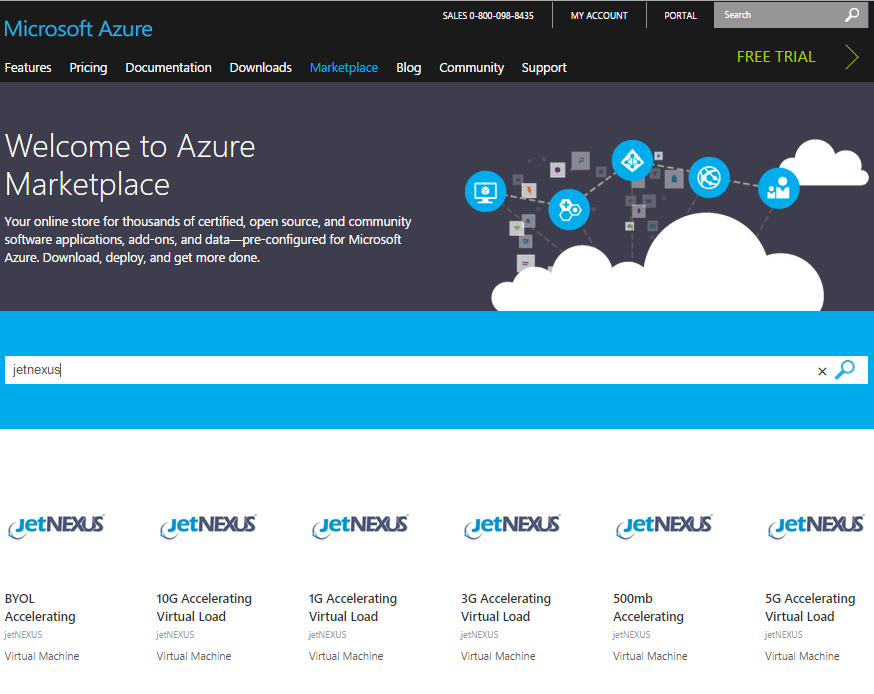
Welcome to Azure Marketplace
-
- Let’s start by accessing the Microsoft Azure marketplace using the URL https://azure.microsoft.com/en-us/marketplace/
- Type “jetnexus” in the search box to show the available load balancers
Create
-
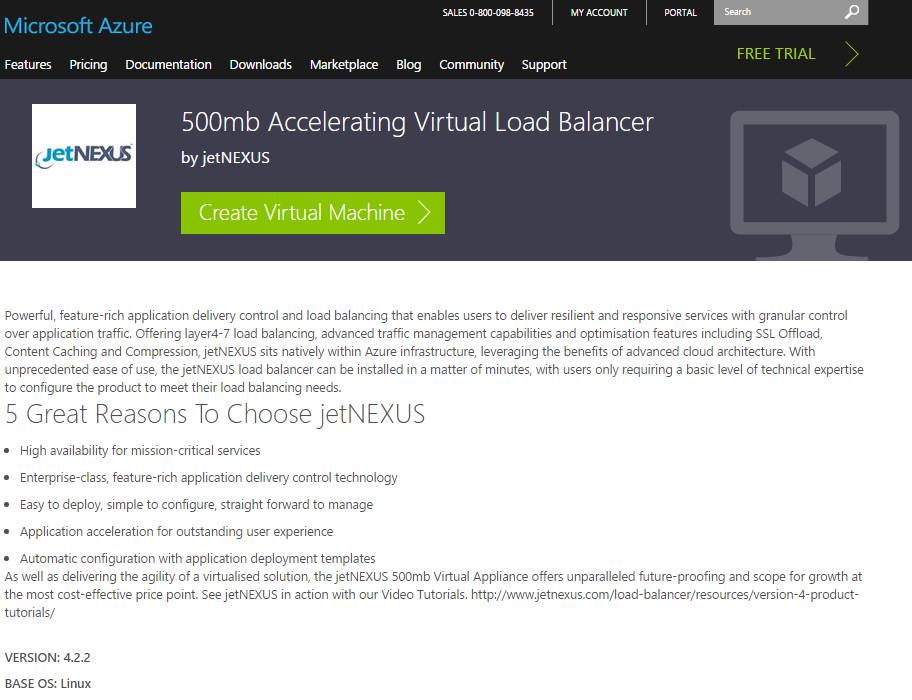
- For this guide let’s use the 500Mb Accelerating Load Balancer which is limited to 500Mbps throughput
-
- Select this and then click Create Virtual Machine
Wait
-
- You will then see the following animation before the create screen is shown
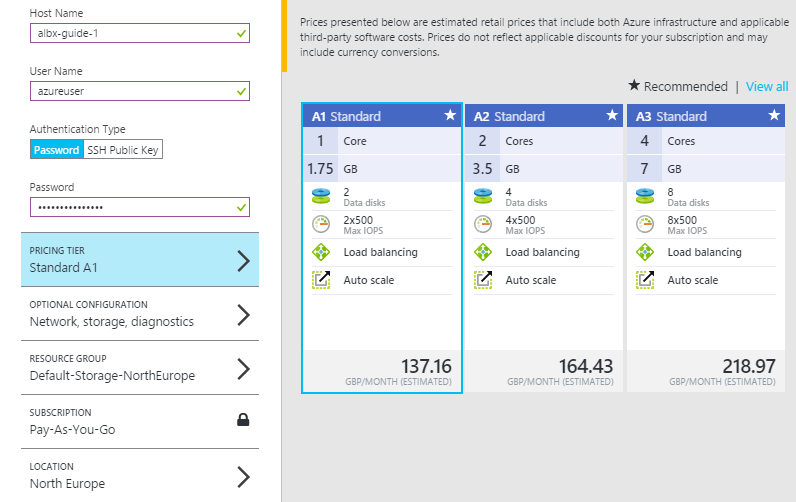
Compulsory Configuration
-
- Add a suitable hostname for your ALB-X – here we have given ours albx-guide-1 as we will be creating albx-guide-2 a little later
- Add username which will be used to log on to the ALB-X
- Add a valid password
- Choose a pricing tier. A1 is acceptable for development environment only
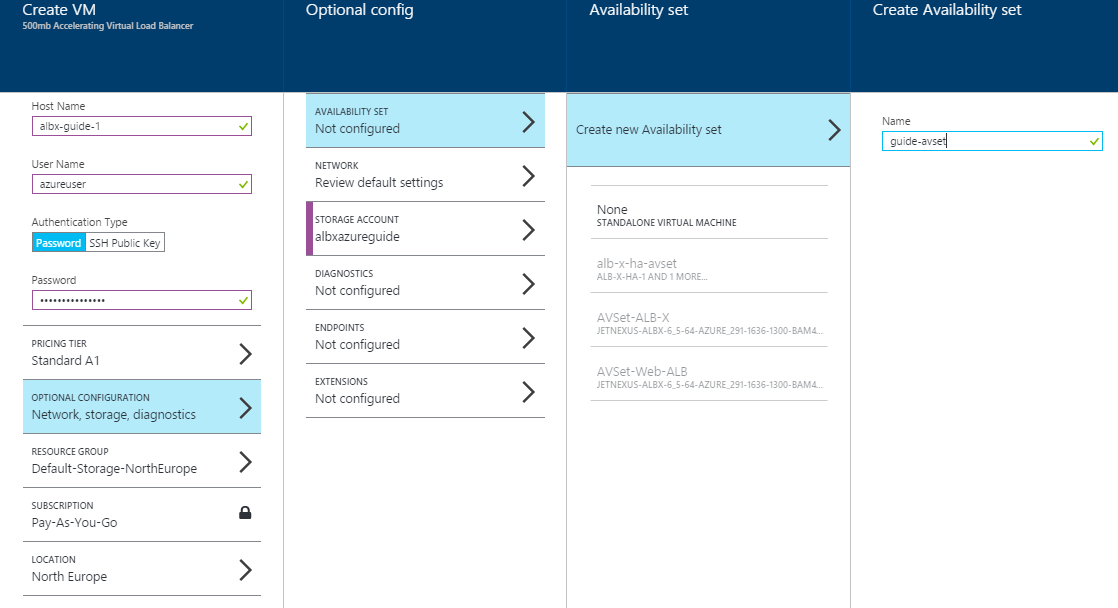
Optional Configuration – Availability Set
-
- To provide redundancy to your application, we recommend that you group
two or more virtual machines in an Availability Set. This configuration
ensures that during either a planned or unplanned maintenance event, at
least one virtual machine will be available and meet the 99.95% Azure
SLA. - In this example we are going to create an availability set called guide-avset
- To provide redundancy to your application, we recommend that you group
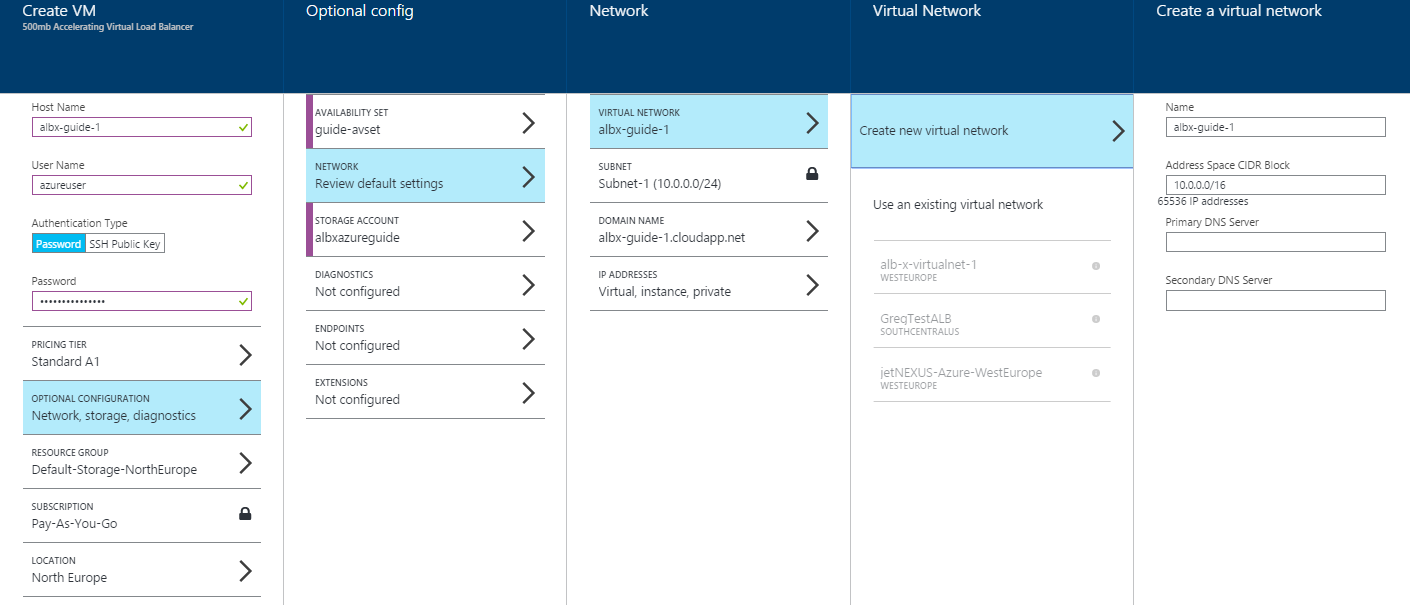
Optional Settings – Network
-
- Here we are creating a new virtual network called albx-guide-1
- This becomes more relevant when you deploy additional ALB-X so they can talk to each other on the local subnet
- You may also use this same virtual network for your application VMs and publish the end points through the ALB-X only
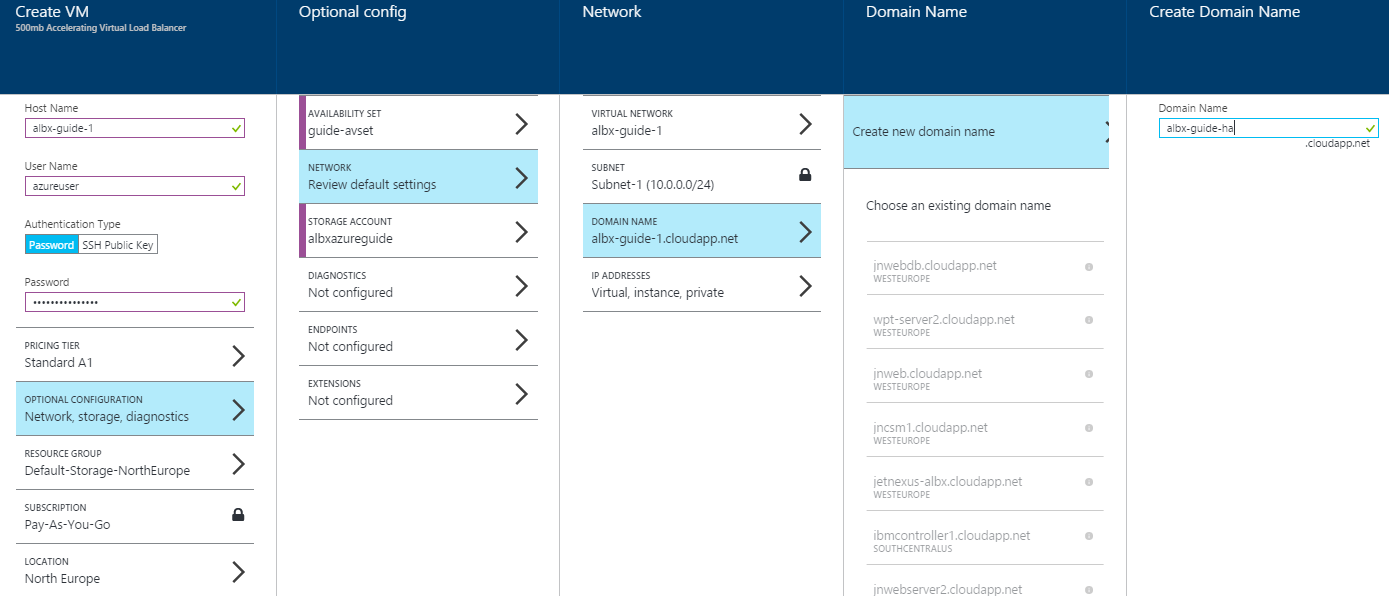
Domain
-
- Create a new domain for your service. This is usually something generic such as Web Service. Here we have named it albx-guide-ha
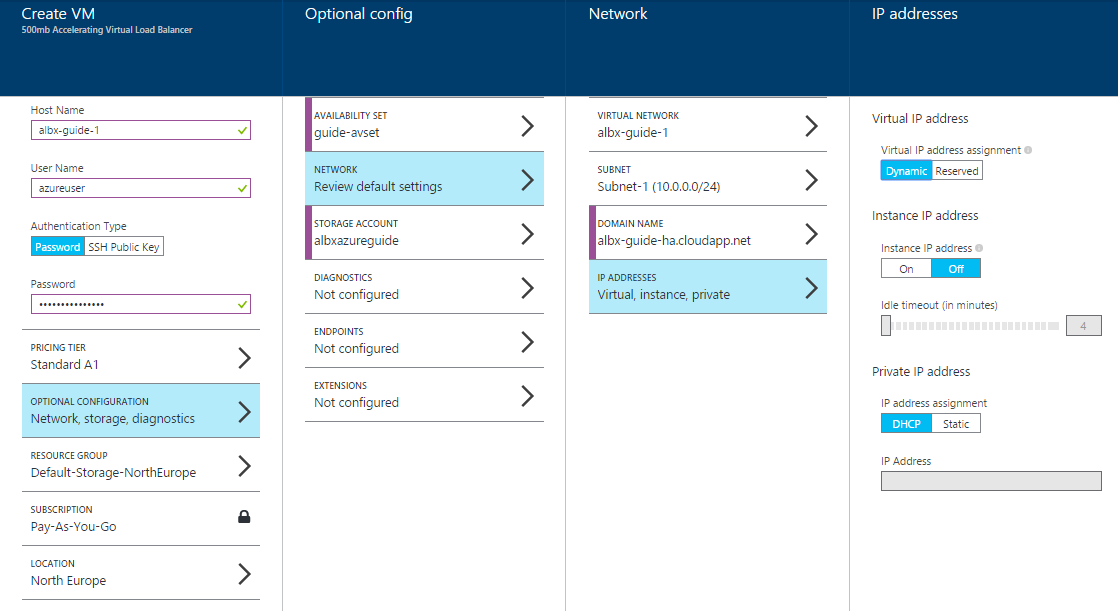
IP Address
-
- You may stipulate the internal IP address of the VM, or like we have done here, leave it to dynamically assign using DHCP
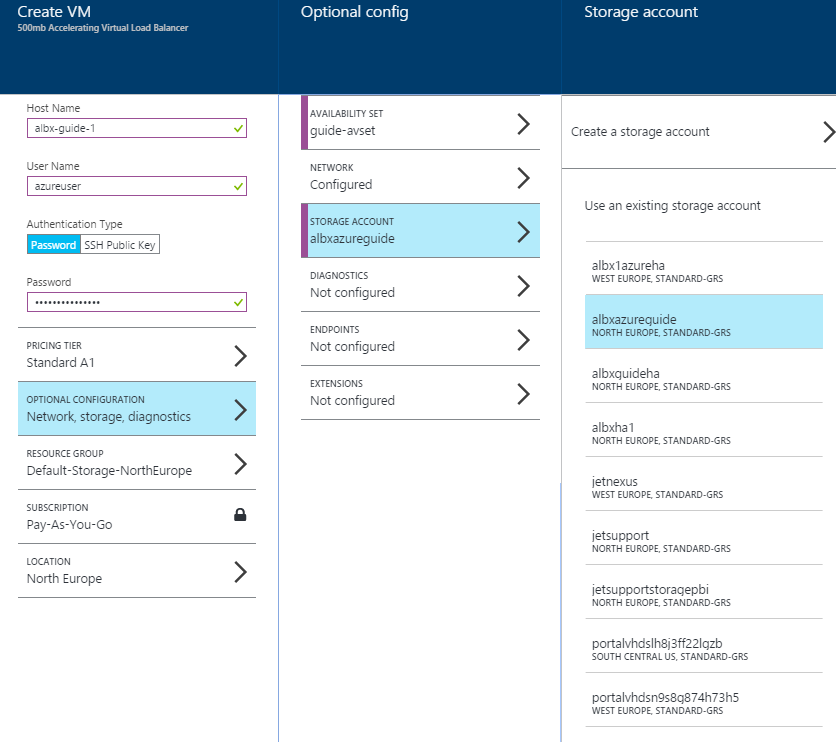
Storage Account
-
- Choose existing storage account or create a new storage account
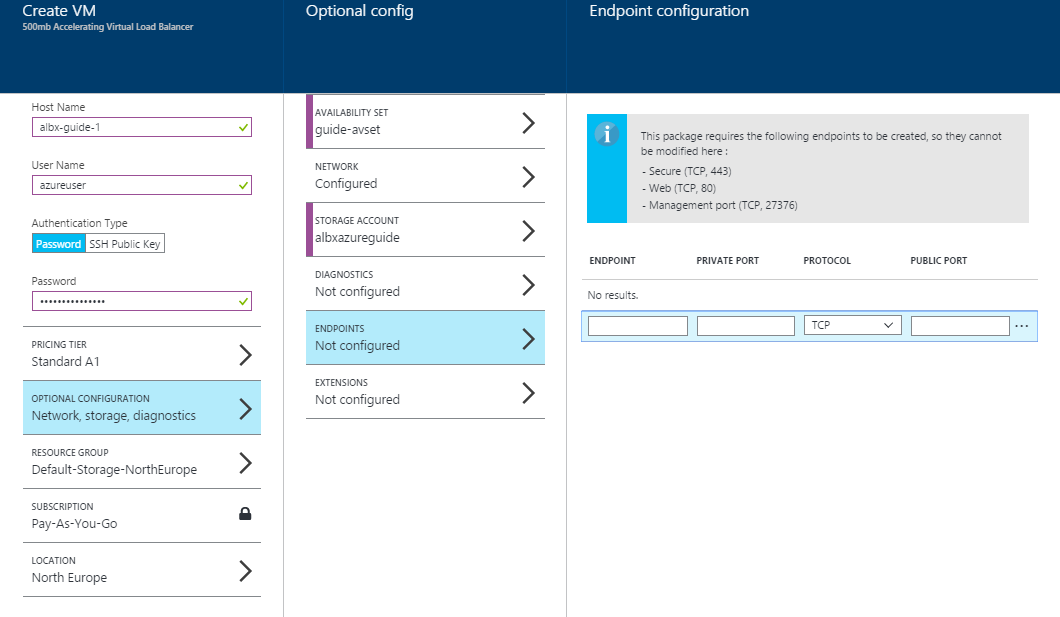
Configure Endpoints
-
- By default your ALB-X will add the following endpoints
- TCP port 443 – Secure Web
-
- TCP port 80 – Normal Web
- TCP port 27376 – Management interface
- TCP port 22 – SSH access
- You can create more endpoints at this stage or once the ALB-X is created
- Note
that when you create the second ALB-X VM it will assign unique public
ports to these end points as they will be in the same service - Also, if you wish to use the Azure load balancer by creating a load balance set then the endpoints need to be unique
- Example: to create load balance set using port 80, you will first need to delete the exisitng port 80 end point
Create Then Buy
-
- Once the optional settings have been compled click Create and then Buy

Wait
-
- Your VM will take around 5 minutes to be created
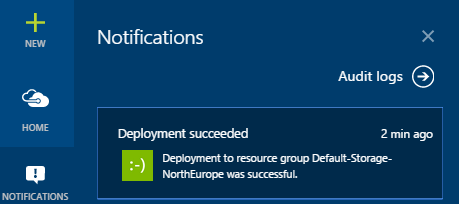
Complete
-
- Once complete you should receive the messages saying Deployment Successful
Create a Second ALB-X
-
- Create a second ALB-X with a different hostname. Here we are using albx-guide-2
- Use the same availability set
- Use the same domain
- Use the same virtual network subnet as the 1st ALB-X
- Use the same resource group
- Use the same location
Create a New Load Balance Set
-
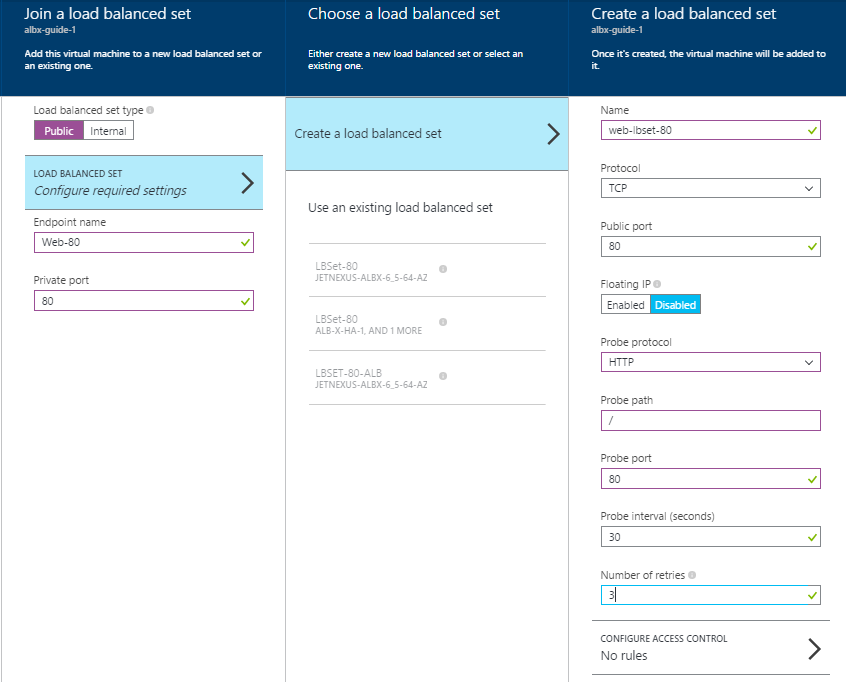
- As previously mentioned to provide HA for a service we need to create load balance set for each service
- The example below adds a load balance set for port 80 on albx-guide-1
- In order to do this we must first delete the old port 80 endpoint
- Create a load balancer set with name – web-lbset-80
- Protocol = TCP
- Public port = 80
- Probe protocol = HTTP
- Probe path = /
- Probe interval = 30
- Number of retries = 3
Join an Existing Loadbalance Set
-
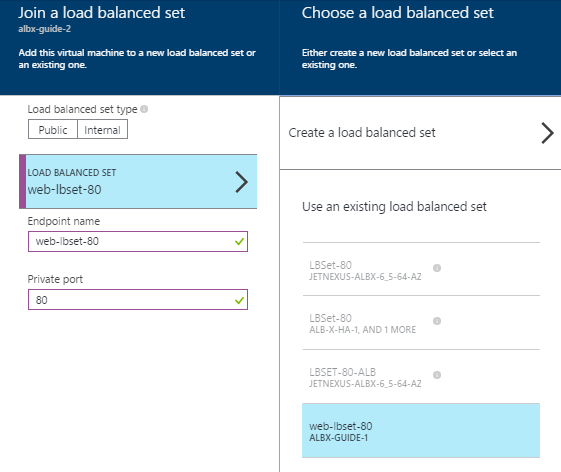
- Now that we have created a load balance set for port 80 on albx-guide-1 you can add this on albx-guide-2
- Make sure that you have already deleted the web port 80 endpoint from albx-guide2
- Click Join from within the Load Balanced sets
- Select web-lbset-80 from “use an existing load balanced set”
Accessing Your ALB-X
-
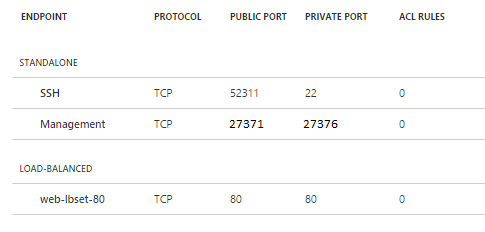
- During the creation process we gave our service a name of albx-guide-ha.cloudapp.net
- A management endpoint was also created equal to 27376
- As we have two ALB-X under the same service we need to make the public management port unique
- By default Azure will deploy the second ALB-X with a uniquely high public port that will map to 27376 internally
- We have deleted the auto created endpoints and changed them for 27371 and 27372 for albx-guide-1 and albx-guide-2 respectively
-
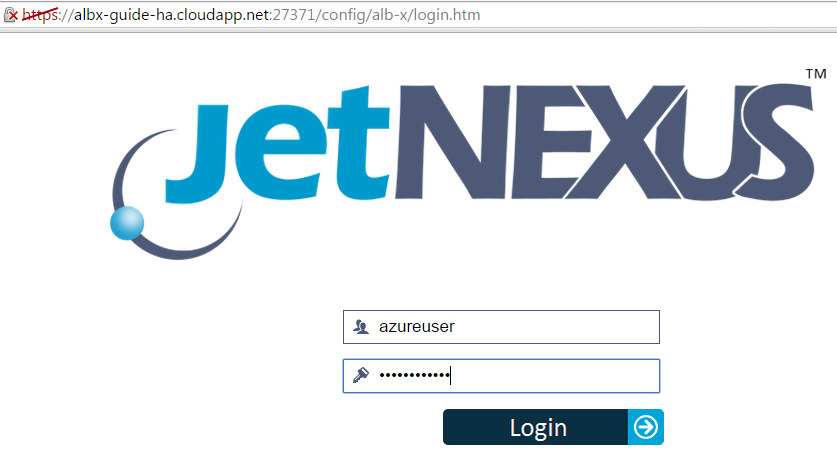
- Here is where we tie the both together to access the ALB-X – https://albx-guide-ha.cloudapp.net:27371
- Login to your ALB-X using the same username and password setup earlier
Virtual Services
-
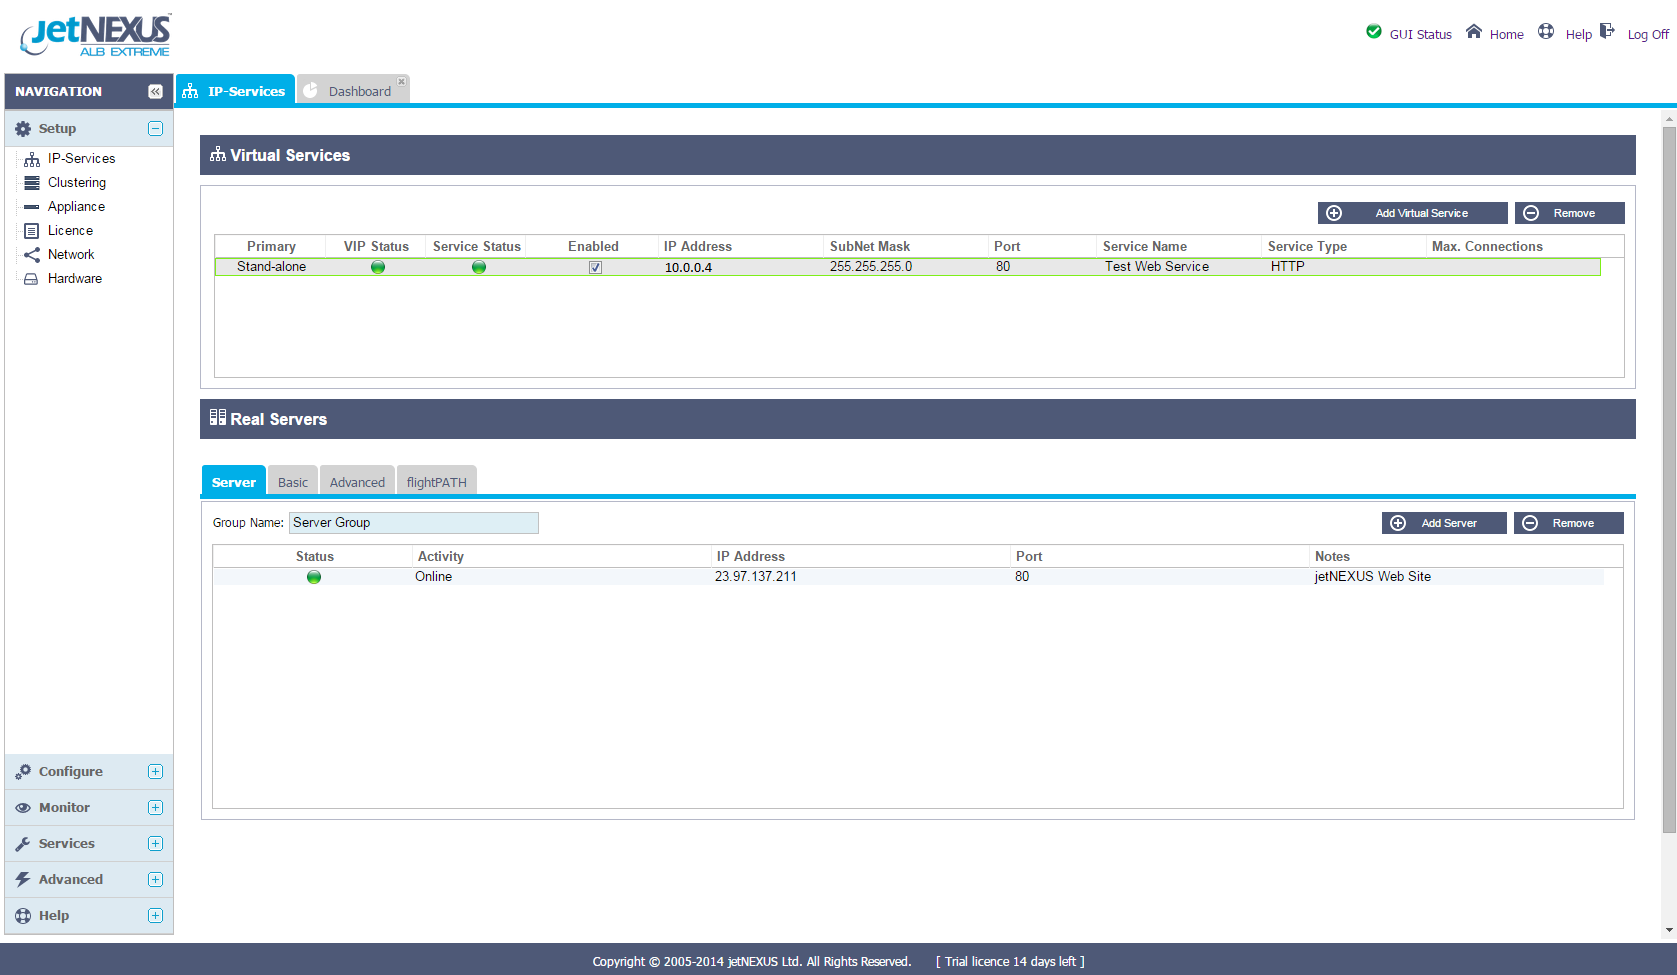
- Once logged on you will be automatically taken to the IP Services page
- Here you will find an example Web Service that uses the www.jetnexus.com web site as a real server
- The
real Server IP address can be any public Internet address or a
private address in the same virtual subnet or routable subnet - Please note that the image below shows a real server IP address that may not be live at the time of reading this guide
Licence your ALB-X
Your
Azure ALB-X current deploys with a 14 day licence. Please contact
sales@edgenexus.io and they will issue a license based on your
MachineID.
This can be found on the Setup–Licence page near the bottom
Please see https://appstore.edgenexus.io/user-guides/user-guide-4-1-2/current-user-guide/licence/ for more information on licensing
 Back to Top